How to setup a mobile wallet and easily maximize your purchases
Signing up for credit cards through partner links earns us a commission. Terms apply to the offers listed on this page. Here’s our full advertising policy: How we make money.
Once you’ve accumulated multiple rewards credit cards, you can easily run out of room in your wallet. And because each travel credit card has different bonus categories and benefits, you’ll often want to carry as many of them with you as possible. With digital wallets this problem is quickly becoming a thing of the past. Apps like Google Pay™, Apple Pay® and Samsung Pay, allow you to store and pay with your credit cards from your phone.
Now you don’t have to worry about carrying around a stack of cards or forgetting the card you need. And setting up a mobile wallet for yourself is easier than you might think. I’ll show you how with step-by-step instructions.
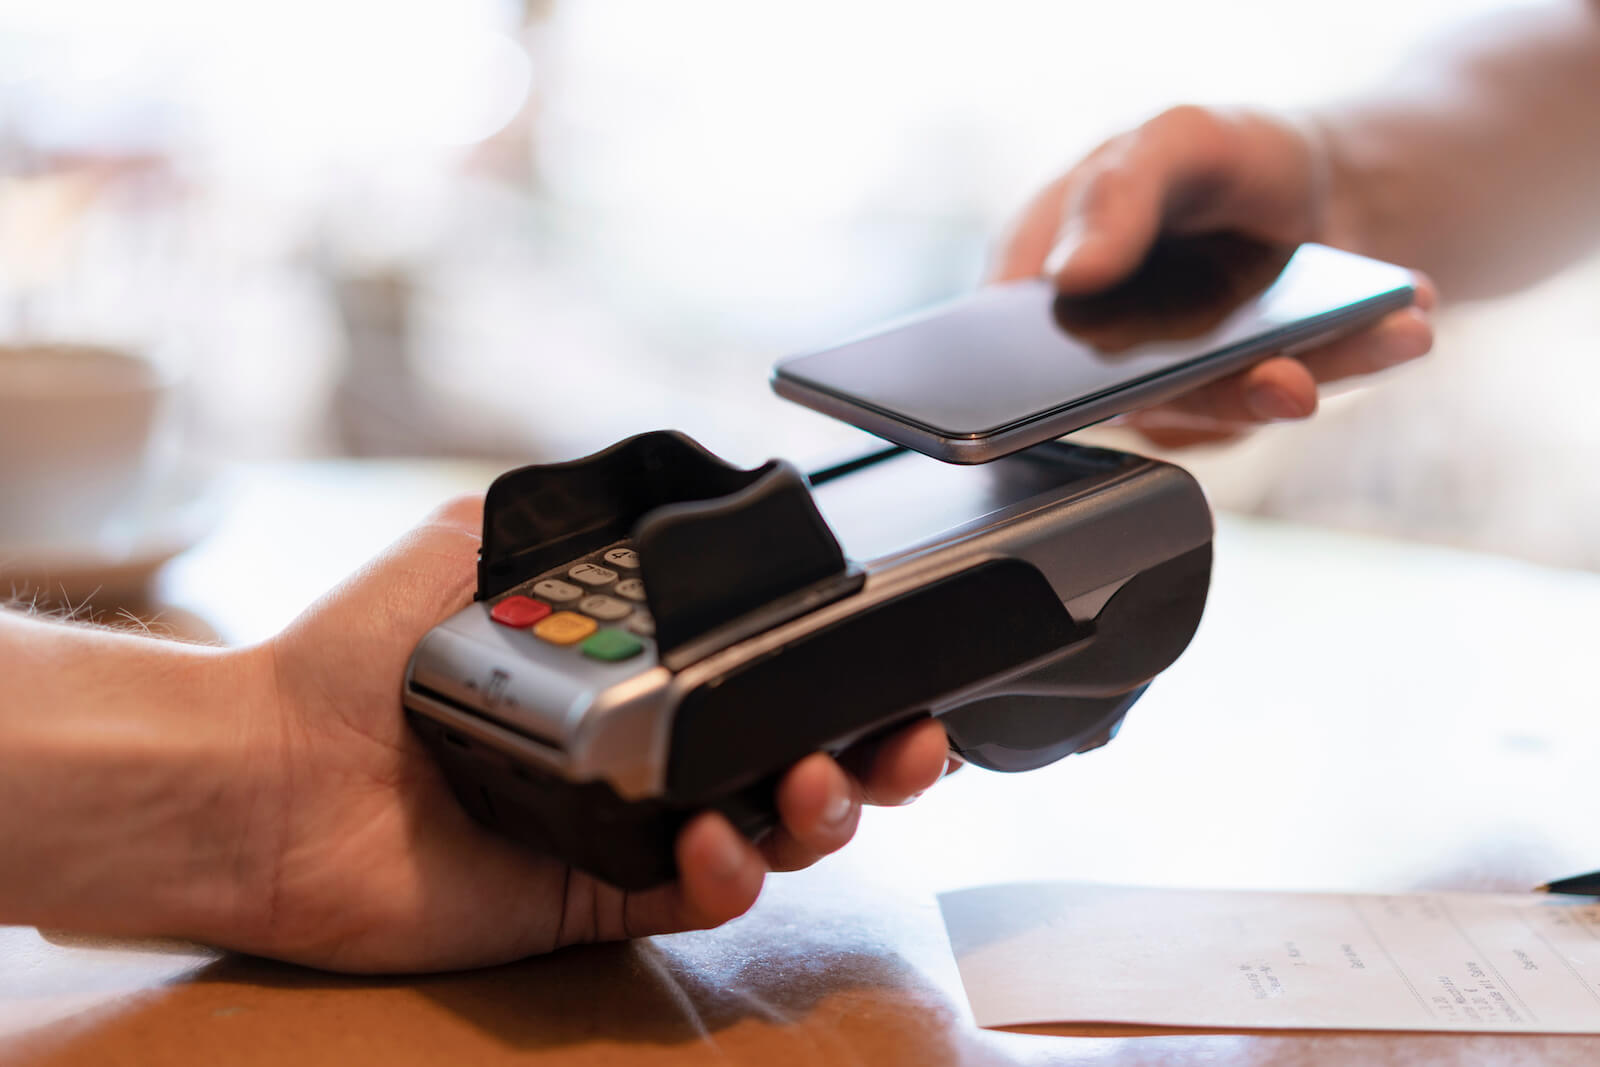
Easily earn bonus rewards with your virtual wallet
Google Pay, Apple Pay, and Samsung Pay are the three most popular virtual wallet apps (in the U.S.). Because you can bring lots of your cards with you, it’s much easier to earn more miles, points or cash back for your everyday purchases and there are occasionally bonuses or promotions for using mobile wallet services.
Some cards even have bonuses for mobile wallet purchases as a standard feature. The U.S. Bank Altitude Reserve Visa Infinite Card earns 3x Altitude Reserve points on travel and on mobile wallet purchases. And the Wells Fargo Cash Wise Visa® card earns 20% more cash back (1.8% cash back instead of 1.5% cash back) on qualifying digital wallet purchases during the first 12 months you have the card. (Including Google Pay™ or Apple Pay®)
The information for the U.S. Bank Altitude Reserve card and Wells Fargo Cash Wise has been collected independently by Million Mile Secrets. The card details on this page have not been reviewed or provided by the card issuer.
Mobile payment apps aren’t accepted everywhere (yet)
As digital wallets are increasing in popularity, they are being accepted at more locations every day, but most of them still aren’t accepted everywhere. However, you can use most mobile payment apps to make online or in-app purchases as well. And if you have access to Samsung Pay you should be able to use it with any card reader because it runs on different technology (compared to other mobile wallets) that allows it to communicate with older magnetic card readers.
While digital wallets will make it easier to organize your credit cards and earn category bonuses, they aren’t all a complete solution yet. That’s because you’re also sometimes limited to how many cards you can add, although this number is usually quite high (7-10+ cards).
Virtual wallets are great for anyone who is concerned about the security of their credit card information. When the mobile payment app communicates with the card reader through NFC (near-field communication) it will not send your credit card number. Instead the app creates and sends a new digital card number (or token) for each transaction. So if the bad guys hack the retailer, (like what happened with Target in 2013) they won’t be able to get a hold of your credit card information.
And even though digital wallet services may sound complicated or confusing, they are actually simple to install and use and with more consumers (and merchants) using them every day, it’s only going to get easier. So if you’re ready to start earning more miles & points, here’s how you can setup a mobile wallet for yourself.
How to set up your virtual wallet
The digital wallet service that makes the most sense for you will depend a lot on what brand of mobile phone you have. For example, Apple Pay is only available on Apple devices, but Samsung Pay and Google Pay aren’t available for download on Apple devices.
Once you’ve decided which app you want to go with, here are instructions for setting up each one.
Apple Pay
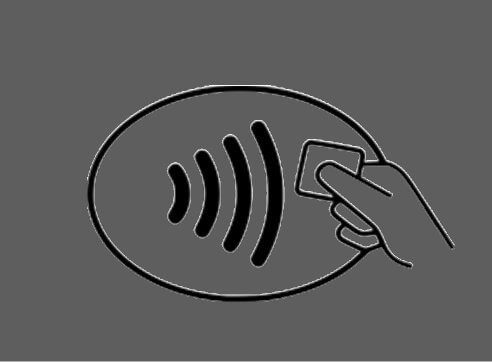
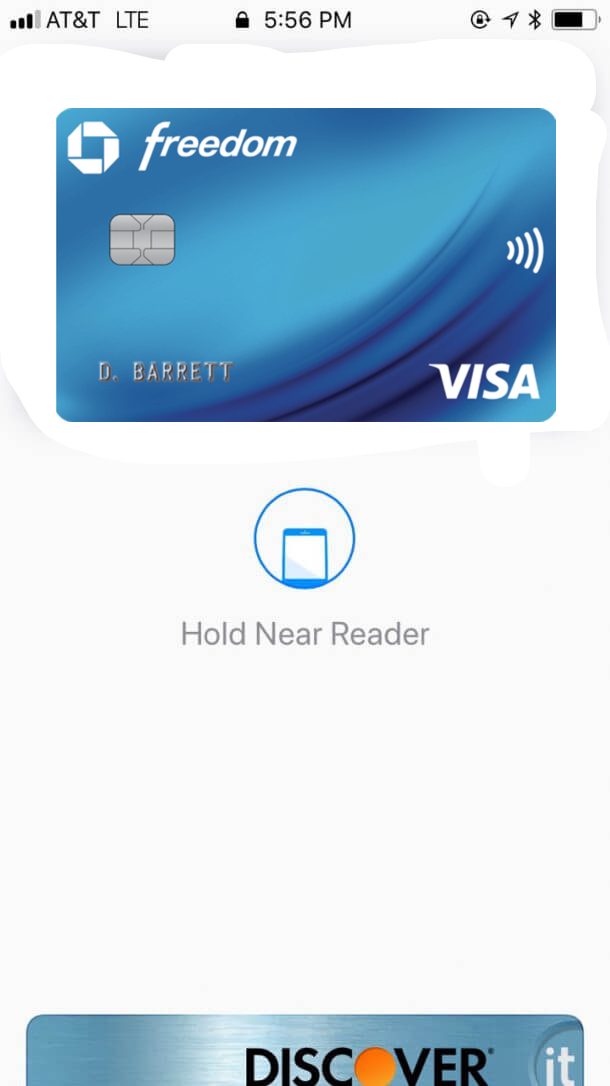
You can use Apple Pay in stores with contactless card readers and for certain in-app or online purchases. So when you want to use Apple Pay in-store, look for the contactless card reader symbol or Apple Pay logo.
Apple Pay is one of the more popular digital wallets because it comes pre-installed on iPhones as part of your Apple Wallet. Once you have it set up, it’s easy to use. You can double click the home button from the lock screen and it should come up. Then just hold your phone near the NFC (near-field communication) card reader and scan your fingerprint with the home button.
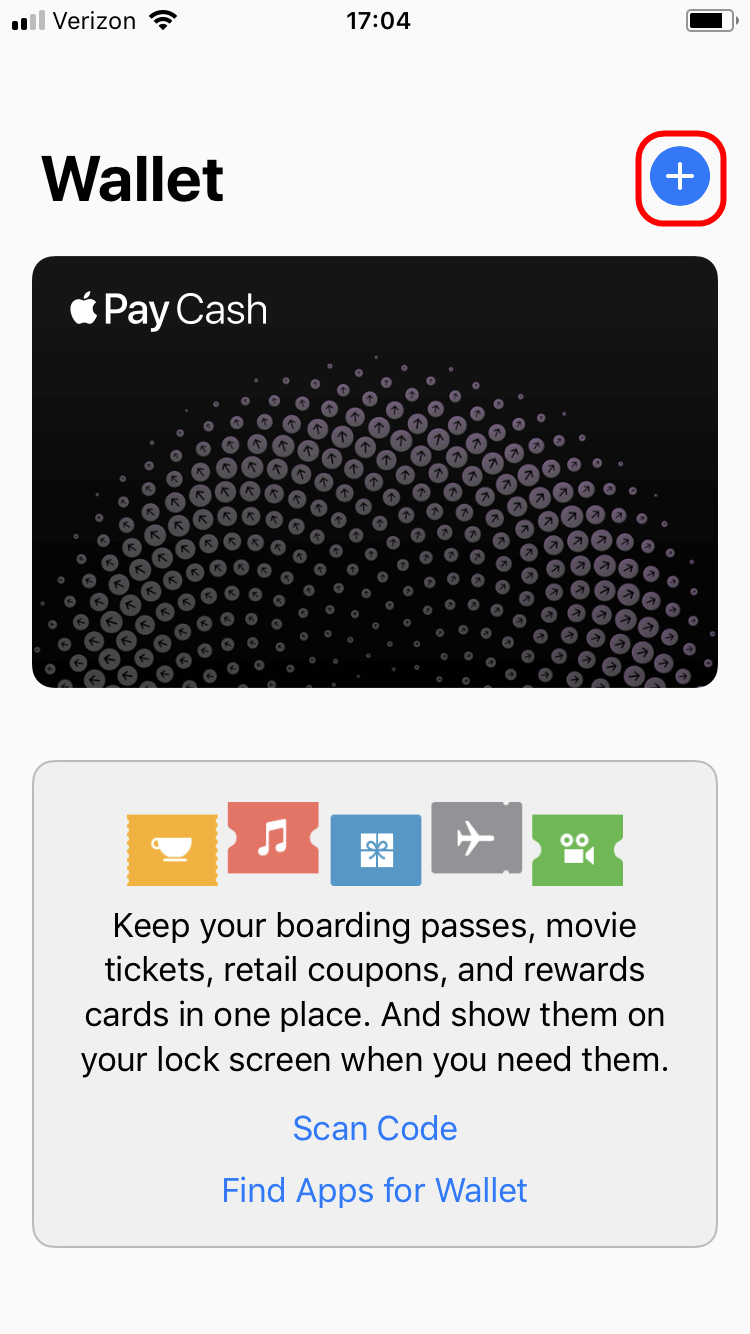
Step 1. Open your Apple Wallet
To add cards to Apple Pay, you’ll need to open your Apple Wallet, then click the “+“symbol.
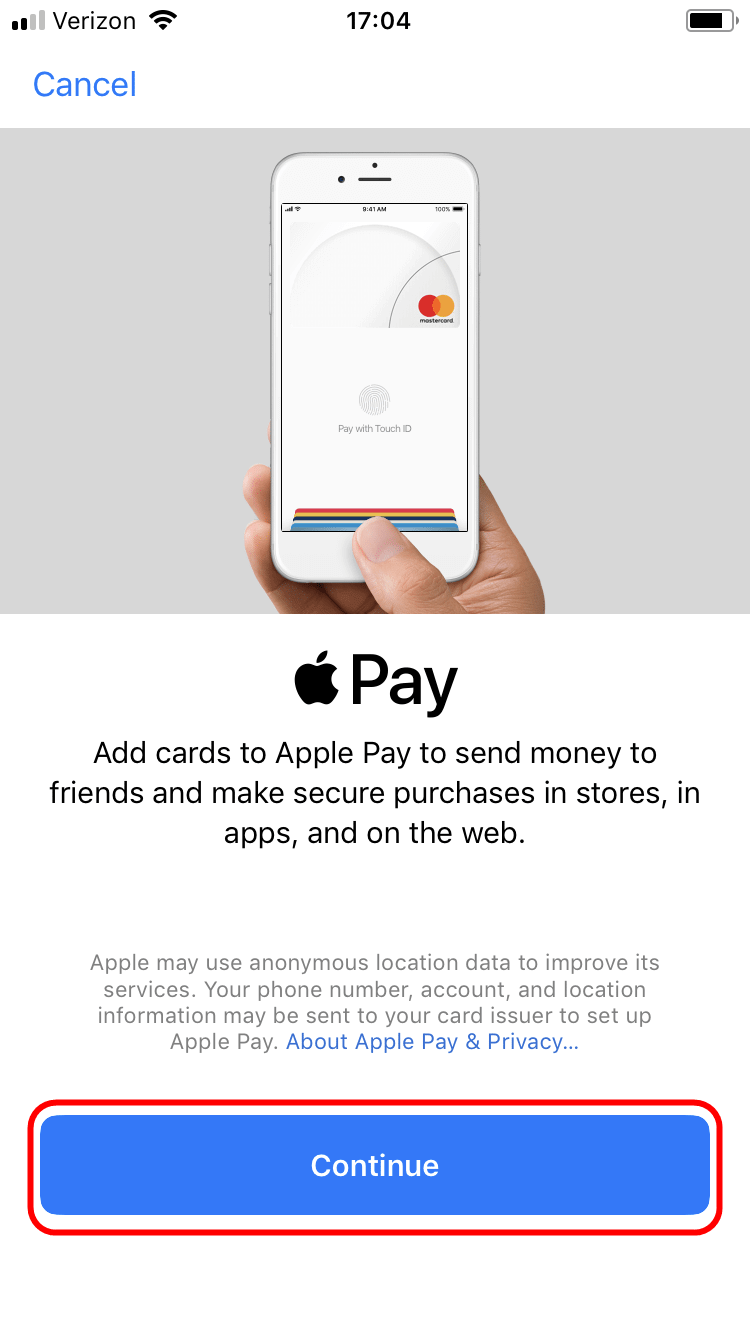
Step 2. Click continue
Now click “Continue.”
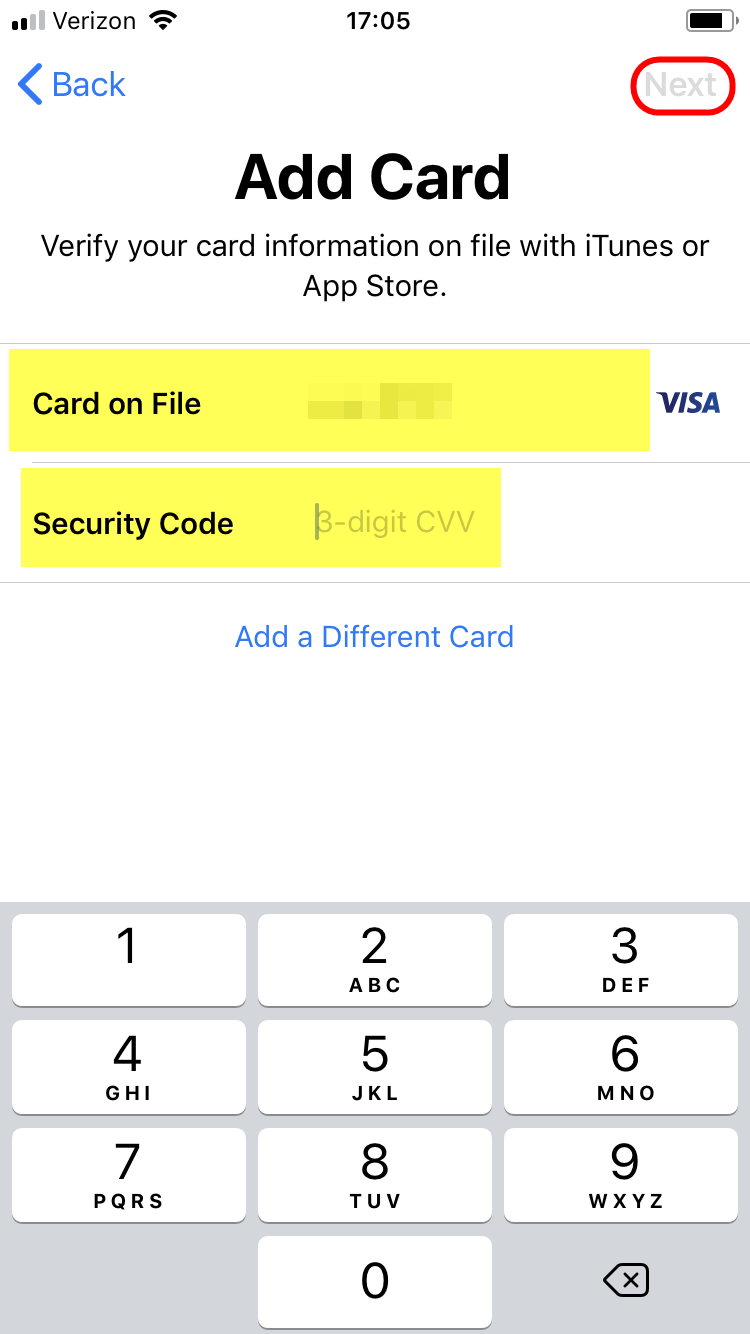
Step 3. Add your card information
Now you can add your card information or verify a card that is already on file in your iTunes account by adding the security code, then click “Next.”
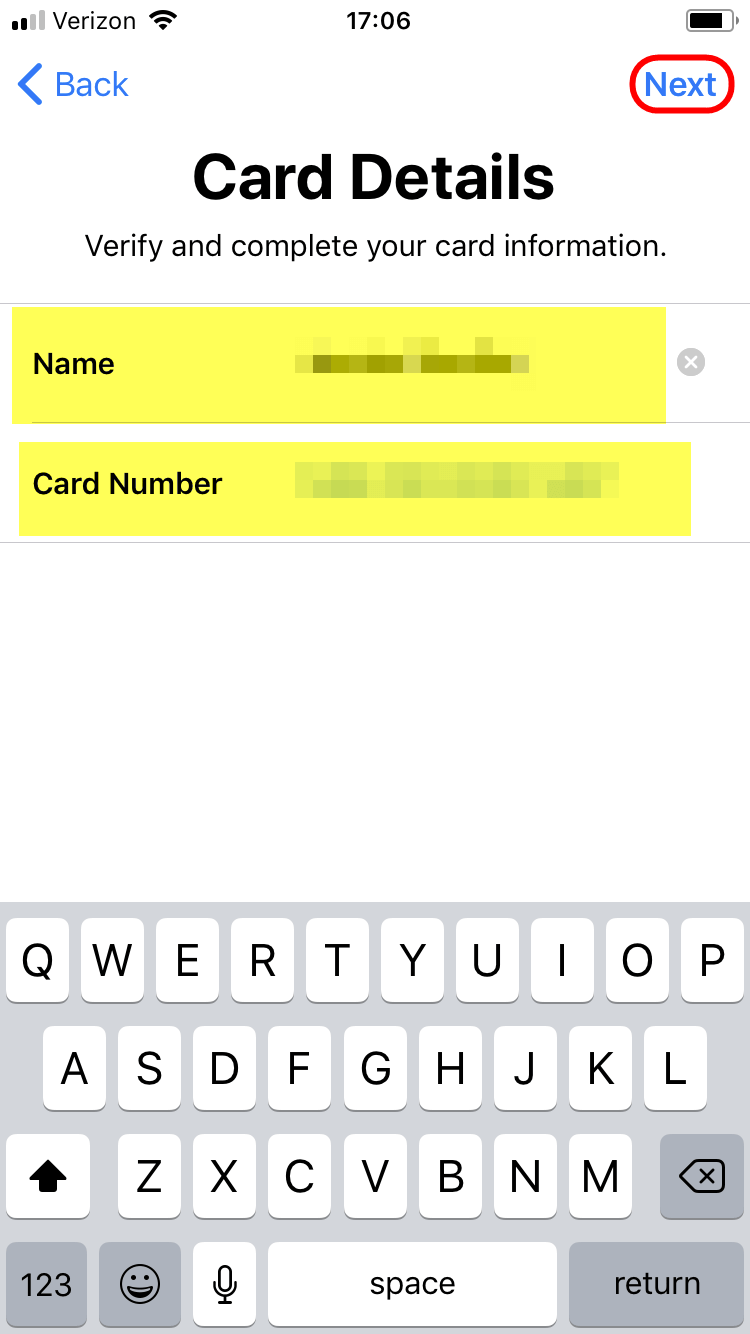
Step 4. Confirm your card information
Add the name on the card and card number, then click “Next” to continue.
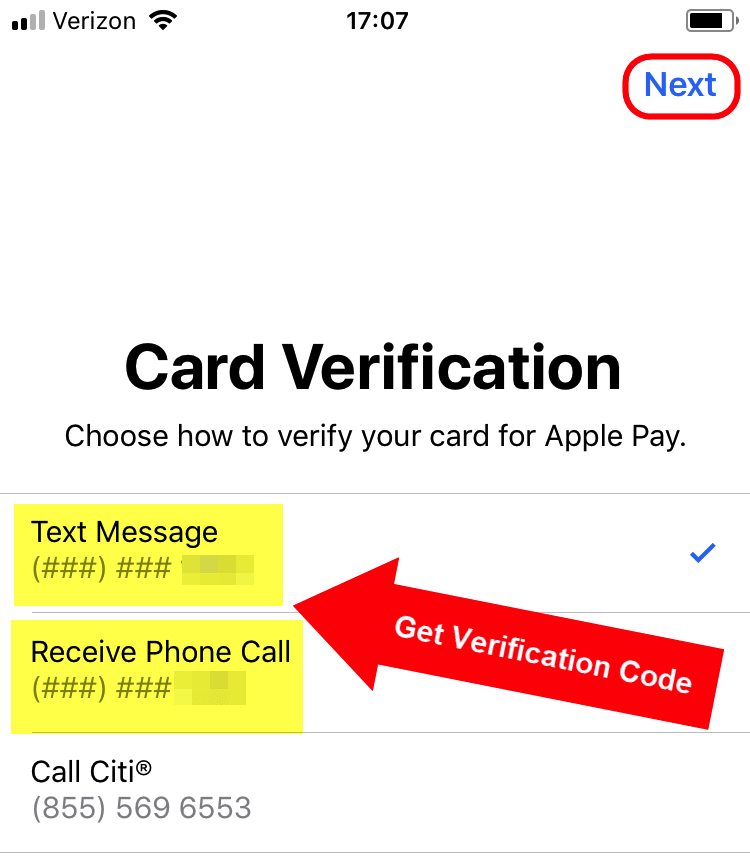
Step 5. Verify your card
Get a verification code by text, email or calling the bank, then select “Next.”
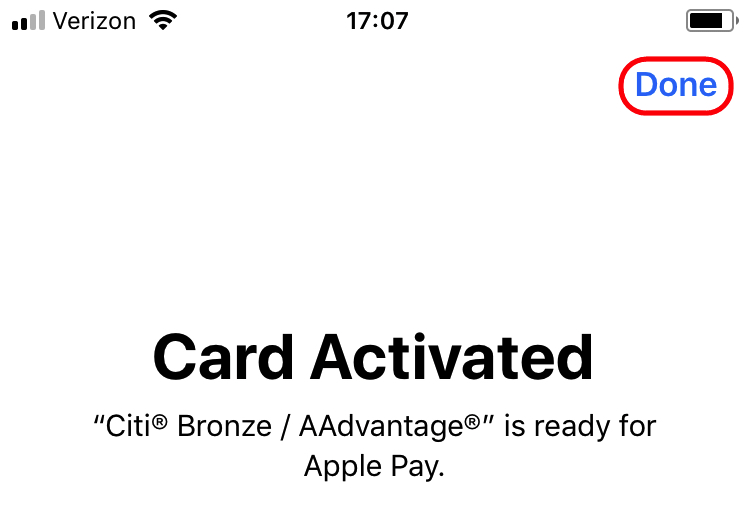
Step 6. Your card is activated
Your card is ready to use. Now click “Done.”
Step 7. Pick your card and pay
When you’re ready to use Apple Pay, open the app and pick the card you want to use. Then verify your identity with your fingerprint or authorization code and hold your device near the card reader to make the payment.
Google Pay
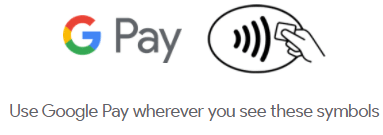
You can use Google Pay for contactless in-store purchases wherever you see these symbols:
Google Pay works with most major banks’ cards and occasionally they have promotions to encourage you to use the service. You can also use Google Pay for select in-app or online purchases.
Note: Android Pay and Google Wallet were replaced by Google Pay.
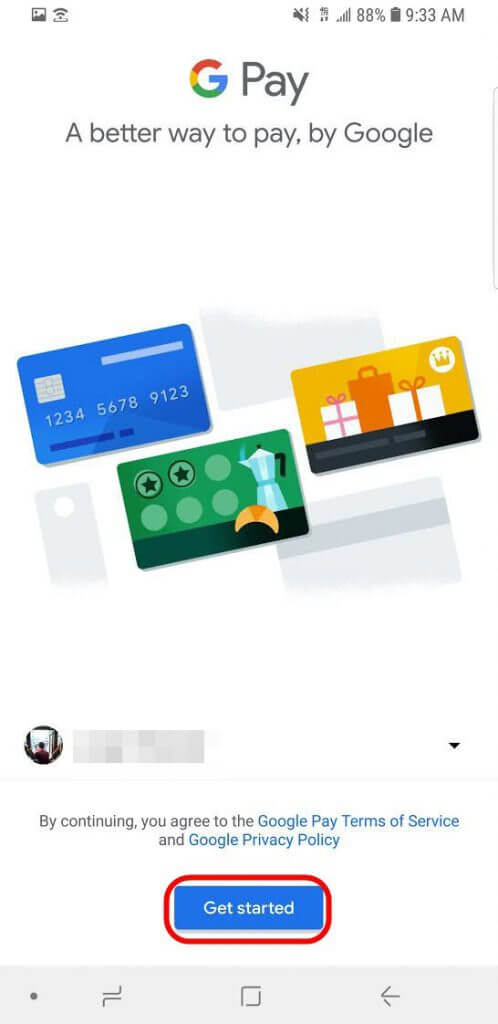
Step 1. Download Google Pay
Install Google Pay and open the app, then click “Get started.”
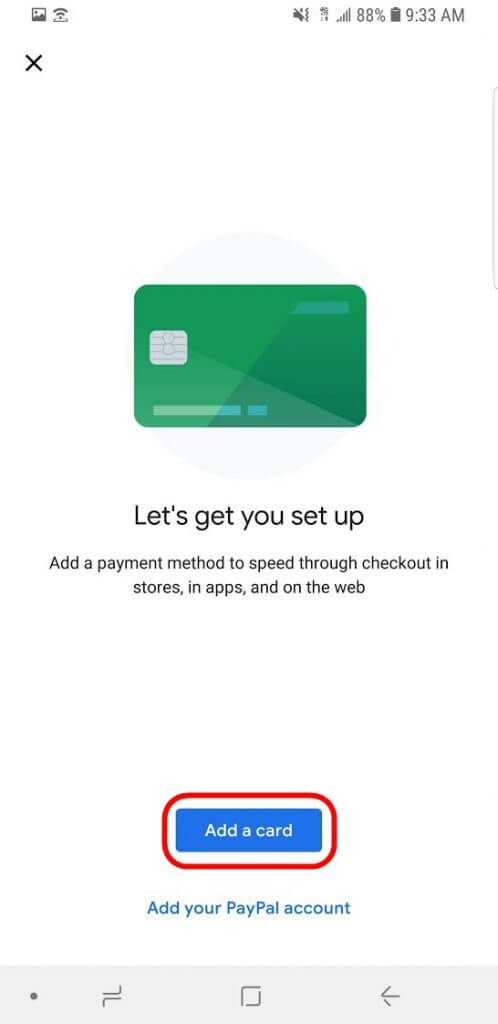
Step 2. Add a card
Now select the “Add a card” button to continue.
Step 3. Choose a card to add
At this point, you can add a new card to Google Pay or you can add a card that has already been saved to your Google account, then click “Continue.”
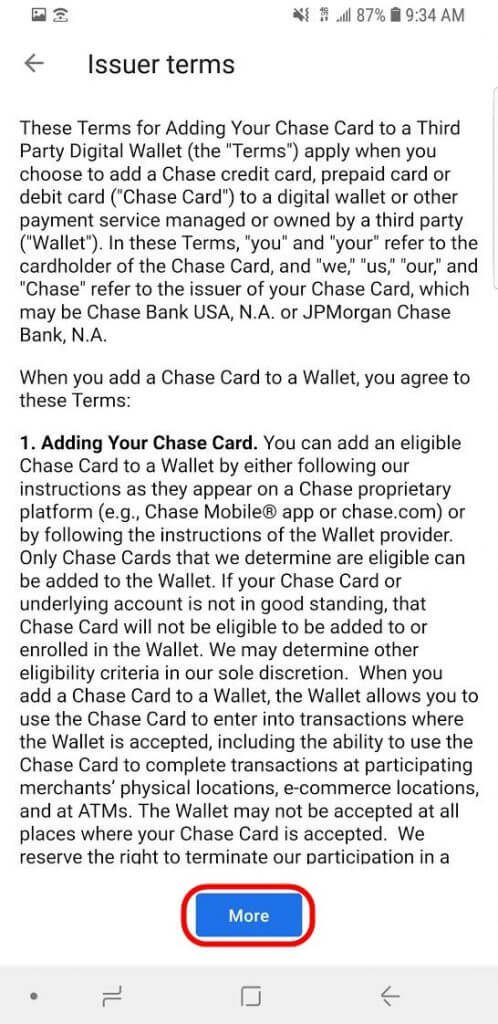
Step 4. Agree to the issuer terms
Review the terms & conditions and click “More.“
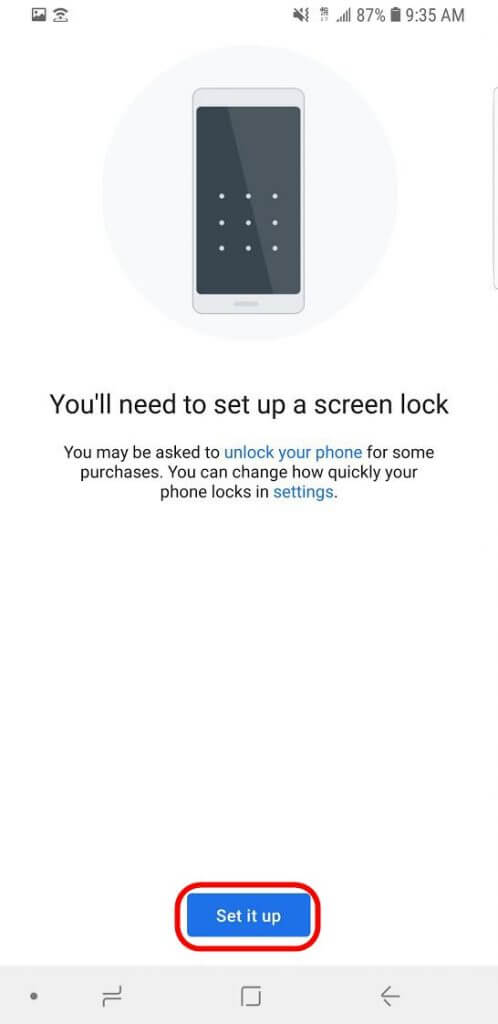
Step 5. Set up a lock screen
If you haven’t already set up a lock screen on your phone, you will need to set it up for security before you continue. To do this select “Set it up.”
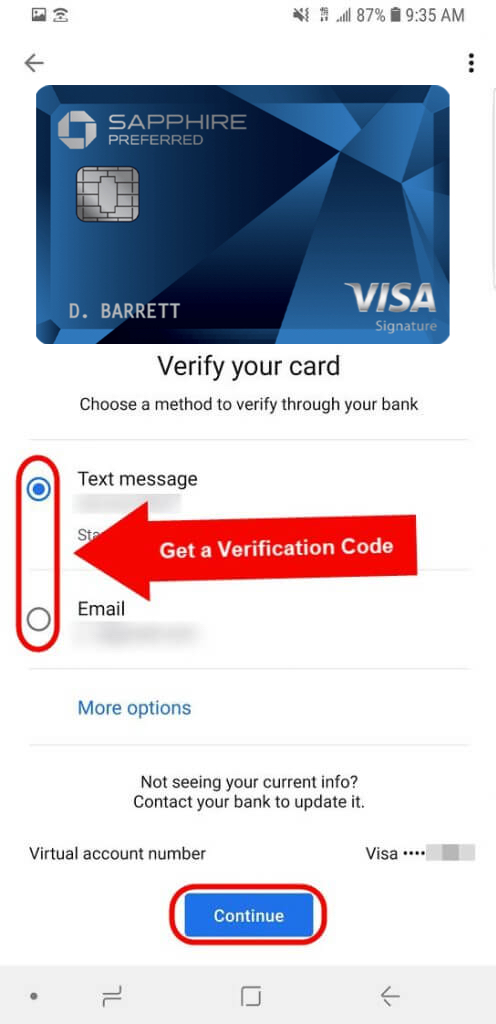
Step 6. Verify your card
Choose how you want to receive a verification code and then click “Continue.”
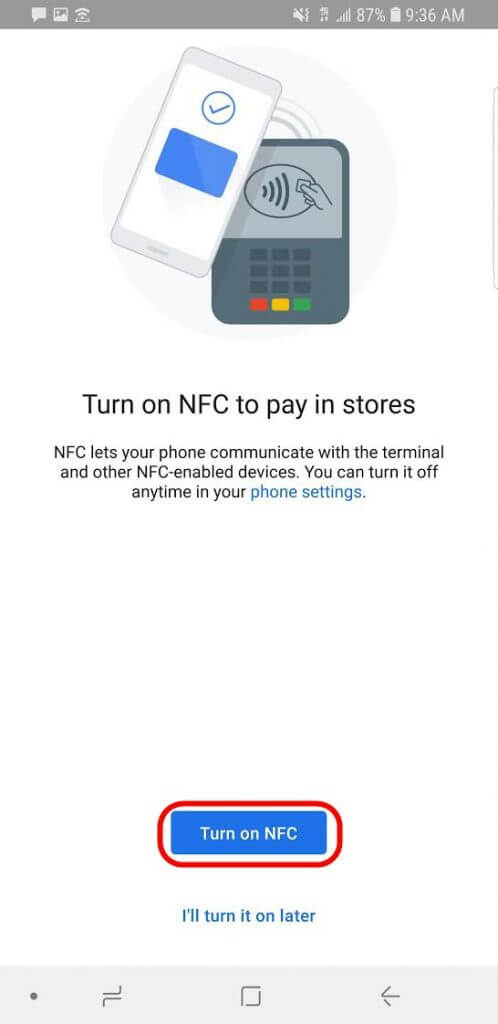
Step 7. Activate NFC
To use Google Pay in stores, you’ll need to turn on NFC.
Step 8. Make your payment
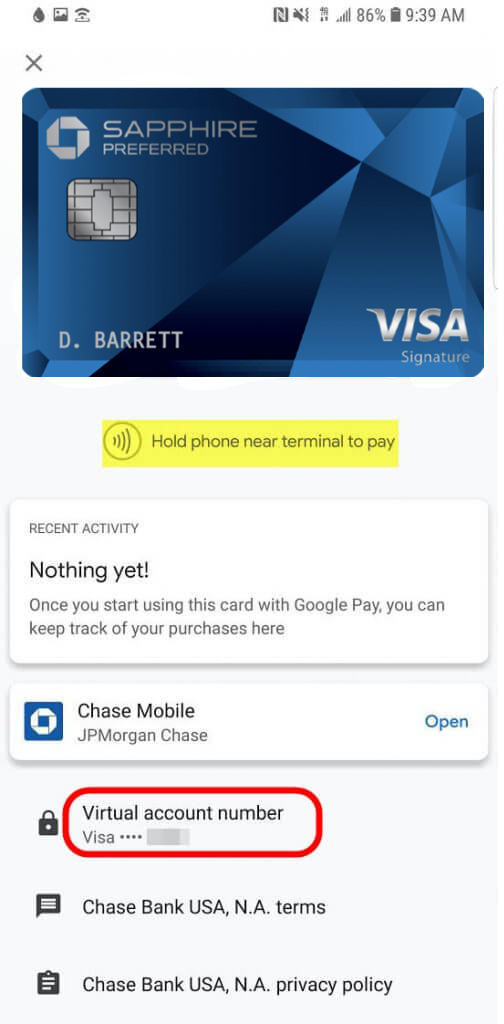
Now you can pick the card you want to pay with and hold it near the card reader to complete the transaction.
Take note of the virtual account number because this is the number the card reader will be receiving. So if the cashier asks for the last four digits of your card, give her this number, not the last four numbers from your actual card.
Samsung Pay
You can use Samsung Pay with almost any credit card reader. The technology Samsung uses is able to communicate even with older card readers that aren’t NFC (near-field communication) enabled. And once you’ve got it set up, you can use it from your lock screen by swiping up from the bottom and verifying your identity (fingerprint or PIN).
You can also use Samsung Pay to make select in-app purchases and you can link it with Visa Checkout to make online payments to 350,000+ merchants.
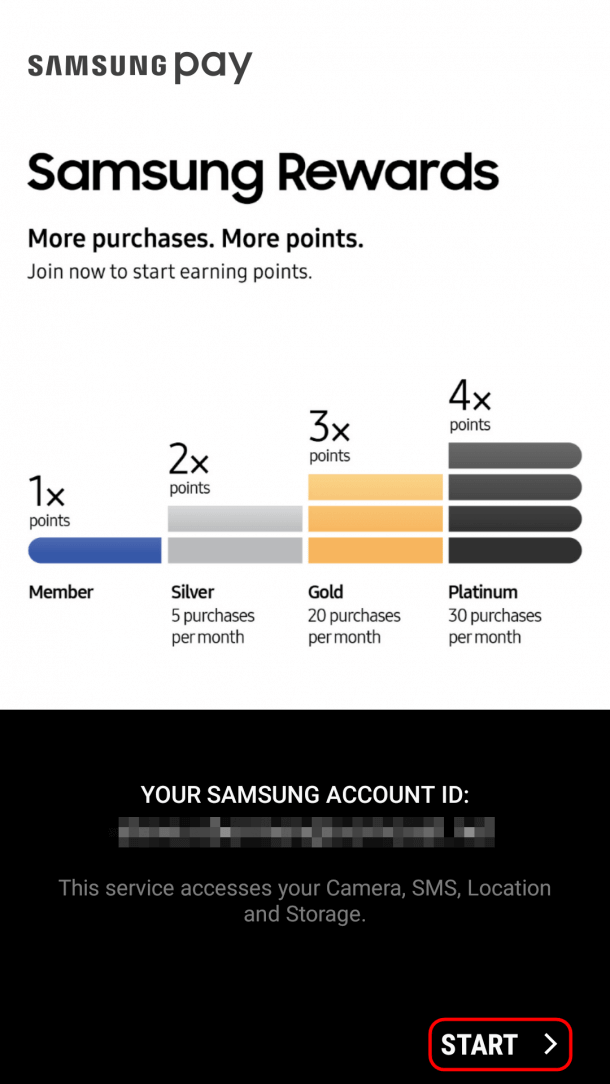
Step 1. Install Samsung Pay
Once you have downloaded Samsung Pay, open the app and click “Start.”
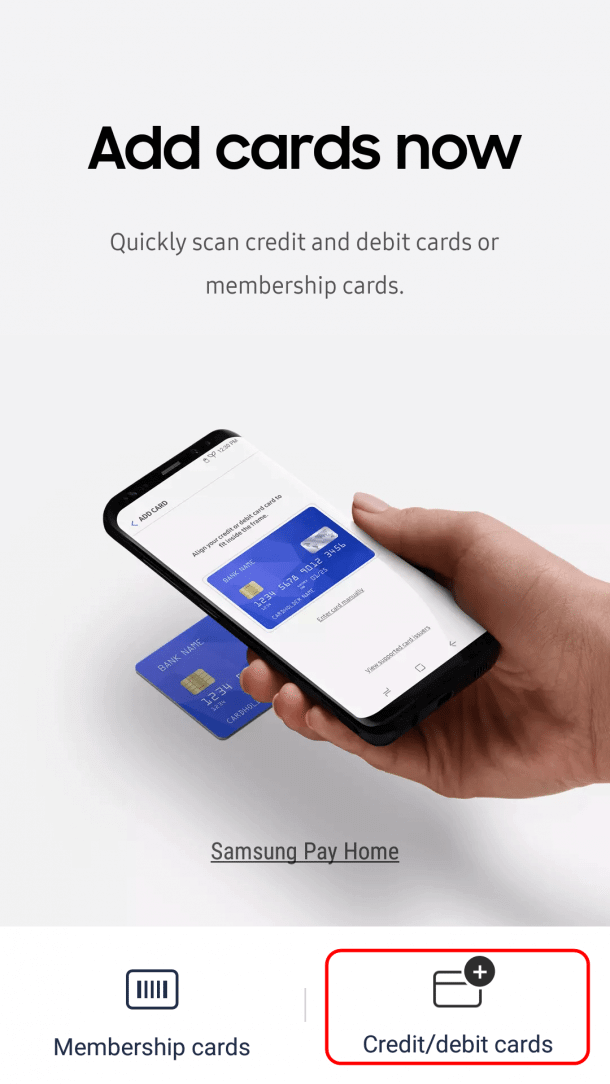
Step 2. Add credit cards
Now click “Credit/debit cards” to begin adding cards to your Samsung Pay account.
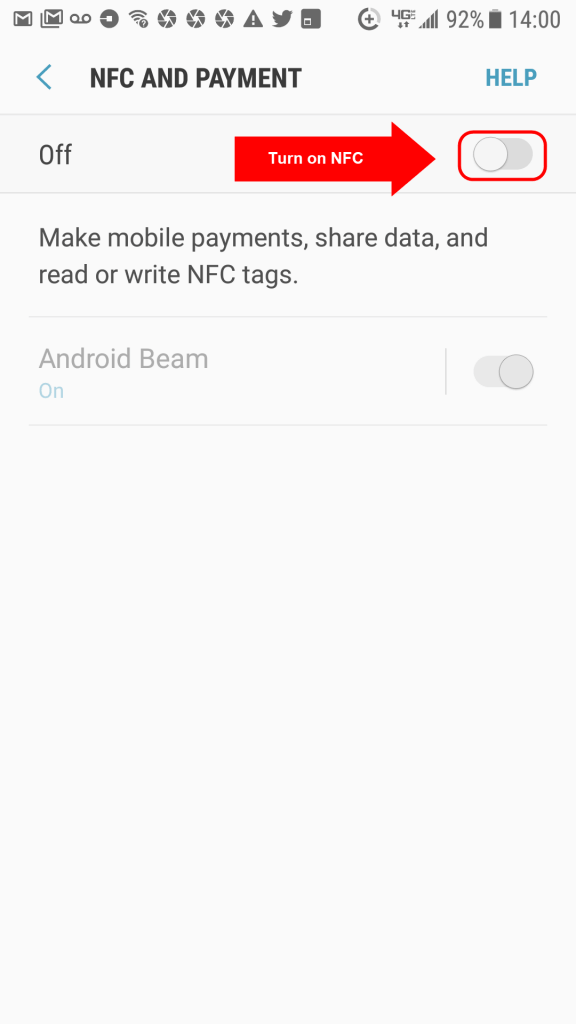
Step 3. Activate NFC
You’ll need to grant Samsung Pay access to certain features of your phone (camera, etc.) and activate NFC for the app to work properly. And if you don’t have a PIN or fingerprint enabled for Samsung Pay, you’ll be prompted to do that as well.
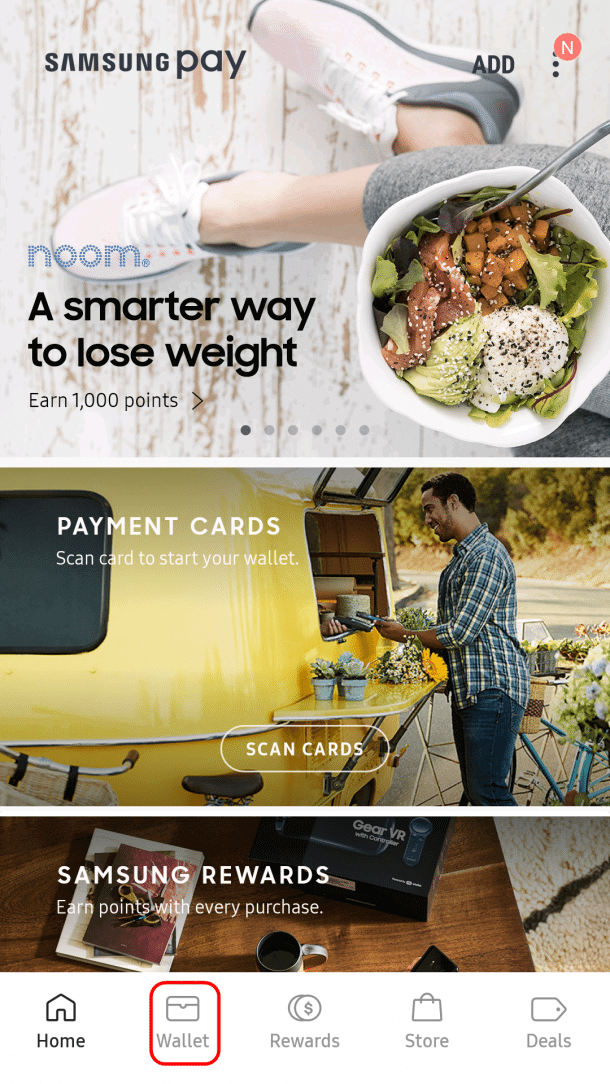
Step 4. Add cards to your Samsung Pay wallet
At the bottom of your app screen select “Wallet.”
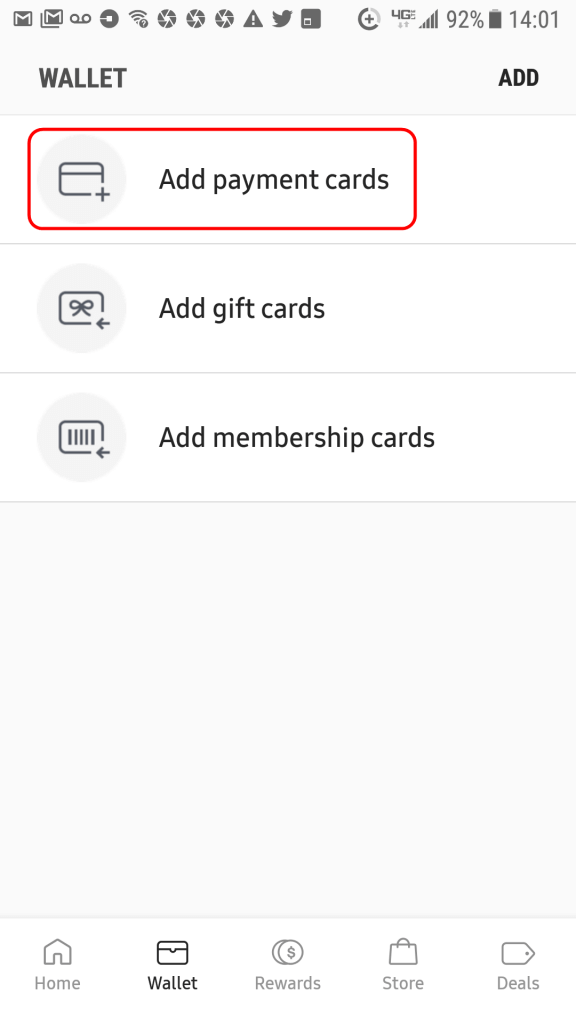
Step 5. Add payment cards
Choose “Add payment cards” to add a card to your Samsung Pay app.
Then you’ll be able to scan your credit card information or enter it manually.
Step 6. Verify the card you added
Once you’ve added your card’s information, you’ll need to verify it by getting a code through either text, email, or by calling the bank.
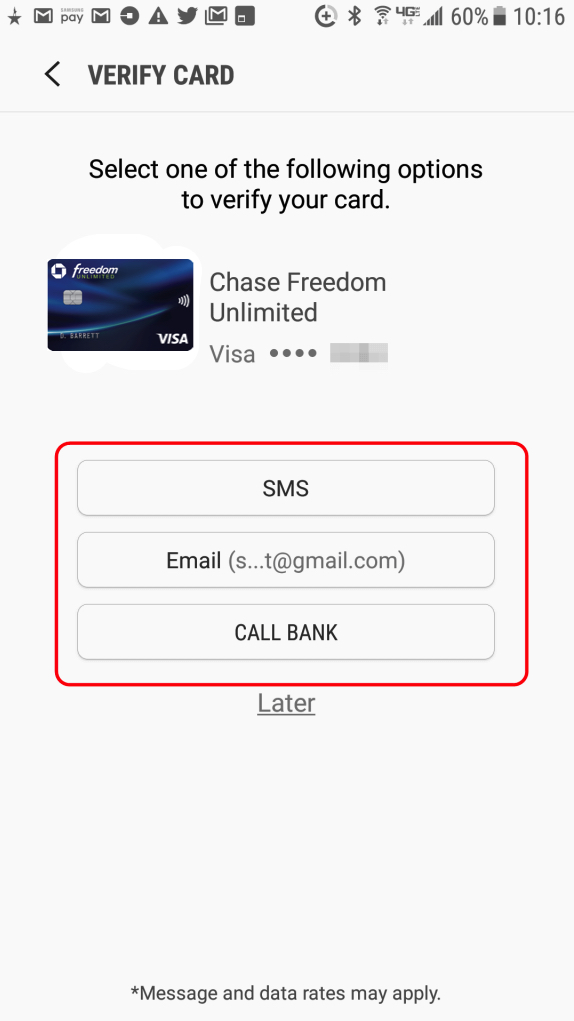
If you are adding a card you are an authorized user for, the verification number & email will be the primary account holder’s information, not your own. So even though your name is on the card, you’ll have to get the security code from the primary cardholder.
Step 7. Add another card or begin using Samsung Pay
Now you can add another card or start using the app.
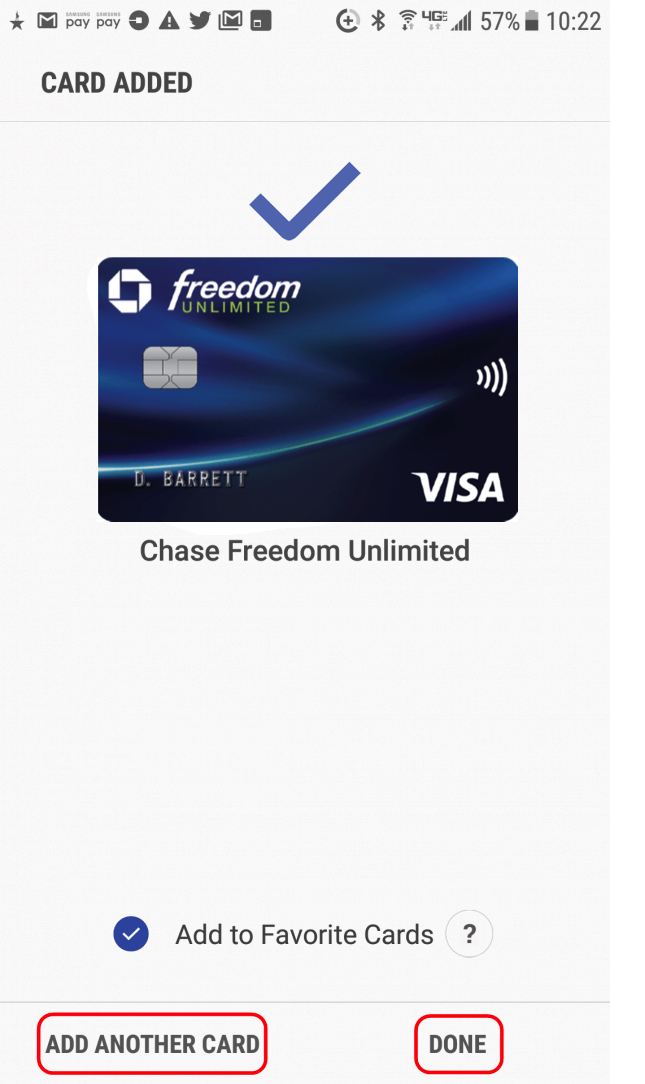
Step 8. Choose the card you want to pay with
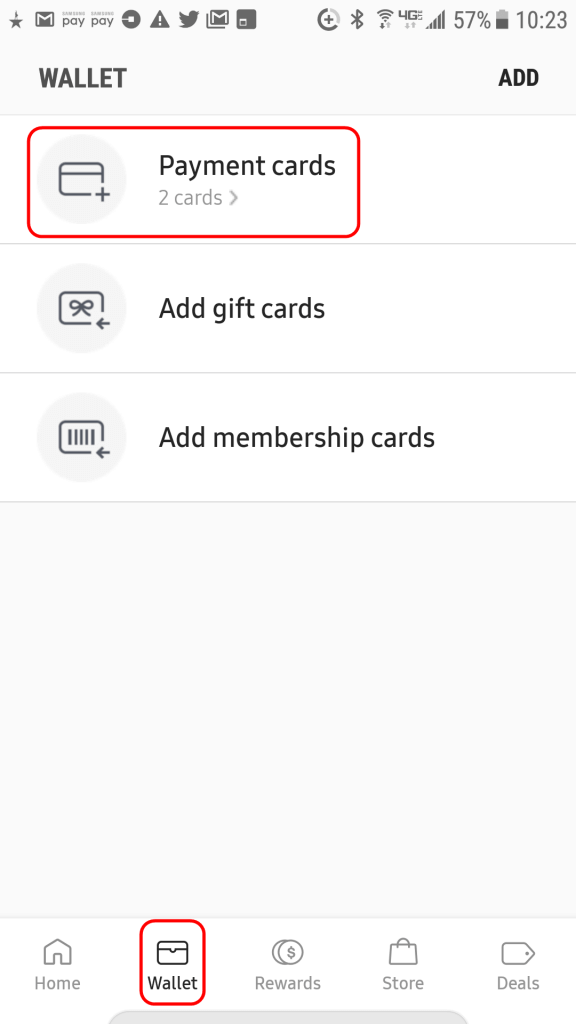
To use Samsung Pay, open the app, select “Wallet,” and then click “Payment cards.”
Step 9. Pick a card
Now you’ll see all the cards you’ve added to the app. Choose the one you want to pay with.
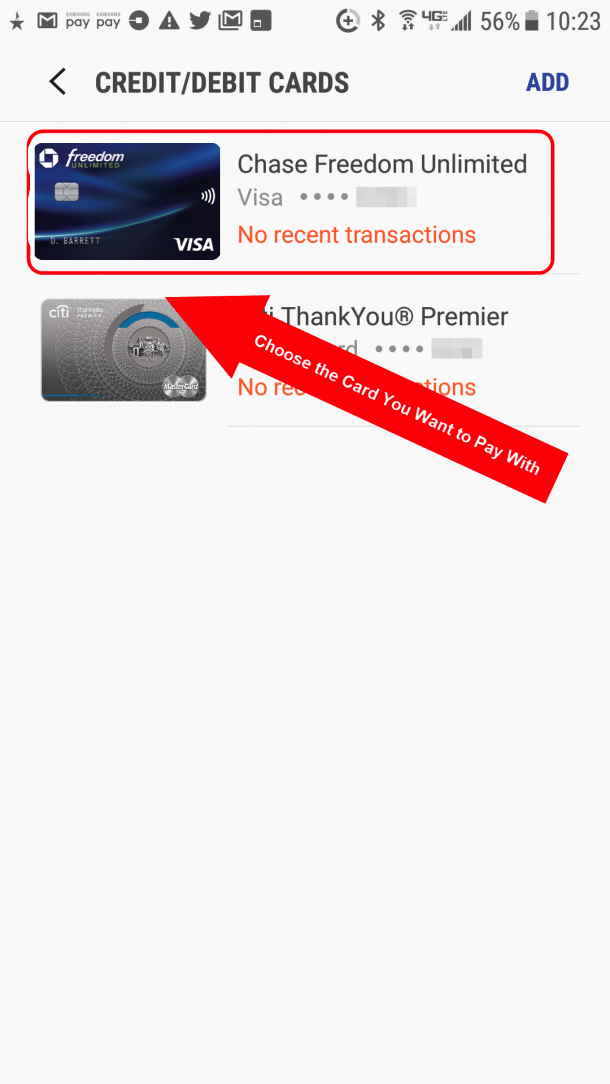
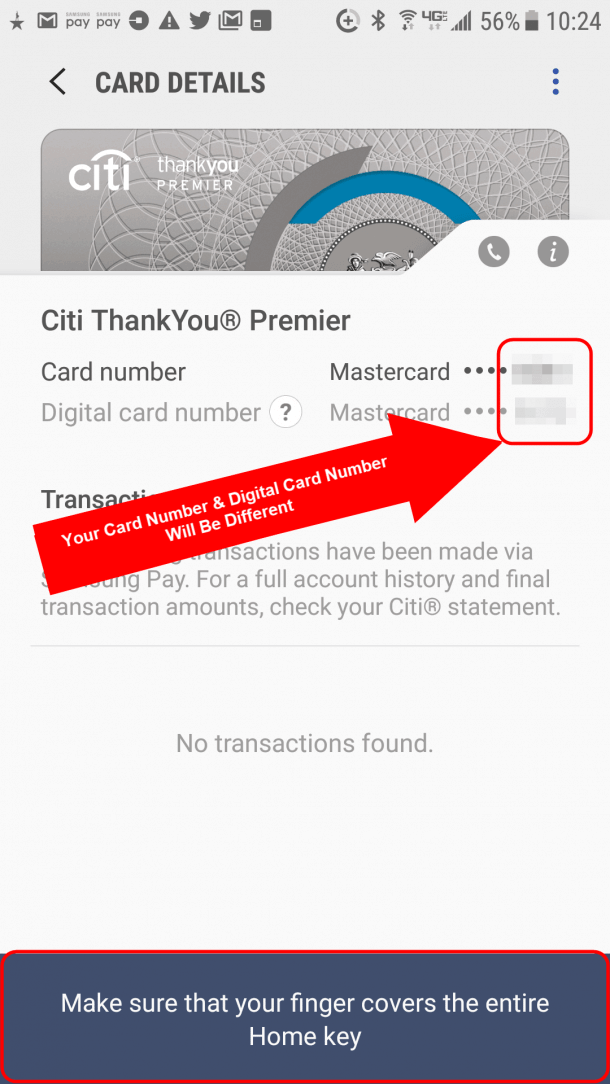
Step 10. Enter your PIN or fingerprint
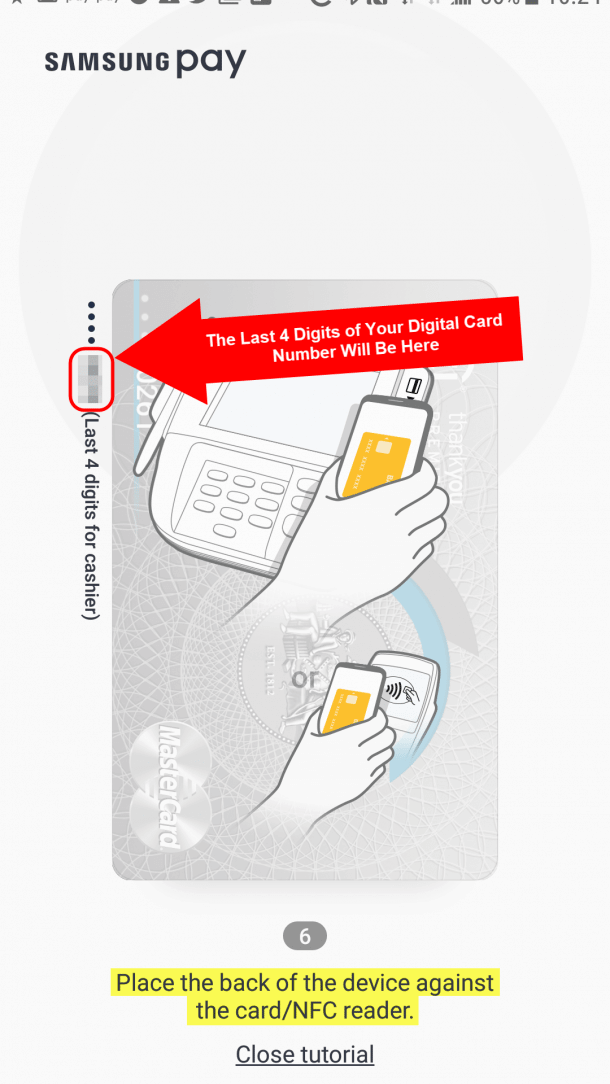
Now you can see the last four digits of your actual card number and you can see the last four digits of the digital card token the app has generated. You’ll see instructions along the bottom to either enter your PIN or hold you finger over the Home key for a fingerprint scan. The security options you have will depend on which ones you set up earlier.
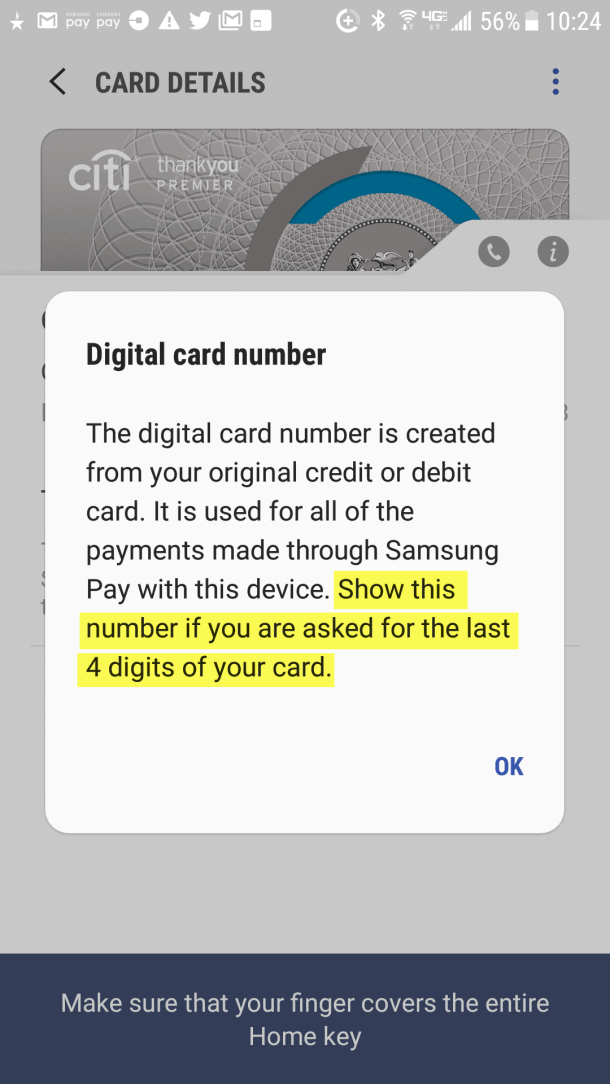
Step 11. The card reader will read the digital card number
If the cashier asked for the last four digits of your card number, share the digital card number’s last four digits, not your actual card number’s last four digits.
Step 12. Pay for your purchase
Now you can hold your phone close to the card reader to pay for your purchase.
Bottom line
Not having the right credit card in your wallet when you want it is quickly becoming a thing of the past. With mobile wallets like Samsung Pay, Google Pay and Apple Pay, you can digitally store your cards’ information and pay with your phone. So it’s easier to get the most out of your credit cards’ bonus categories.
And some cards, like the US Bank Altitude Reserve card, even offer bonuses on mobile wallet purchases. Mobile payment apps may not be accepted at every store, but they are being accepted at more and more locations everyday.
| For more travel and credit card news, deals and analysis sign up for our newsletter here. |
Editorial Note: We're the Million Mile Secrets team. And we're proud of our content, opinions and analysis, and of our reader's comments. These haven’t been reviewed, approved or endorsed by any of the airlines, hotels, or credit card issuers which we often write about. And that’s just how we like it! :)



Join the Discussion!