How to Customize Capital One Cards With Your Own Photos!
Signing up for credit cards through partner links earns us a commission. Terms apply to the offers listed on this page. Here’s our full advertising policy: How we make money.
Update: One or more card offers in this post are no longer available. Check our Hot Deals for the latest offers.
Did you know you can customize the look of certain Capital One cards, like the Capital One® Venture® Rewards Credit Card or the Capital One® Savor® Cash Rewards Credit Card?
Capital One cards are pretty sharp to begin with. But it’s awesome that they give you the ability to slap your own image on the front.
I’ll show you how it’s done! And give you a list of guidelines to follow to ensure Capital One doesn’t deny your request.
The information for the Capital One Savor Cash Rewards card has been collected independently by Million Mile Secrets. The card details on this page have not been reviewed or provided by the card issuer.
How to Put Your Photograph on a Capital One Card
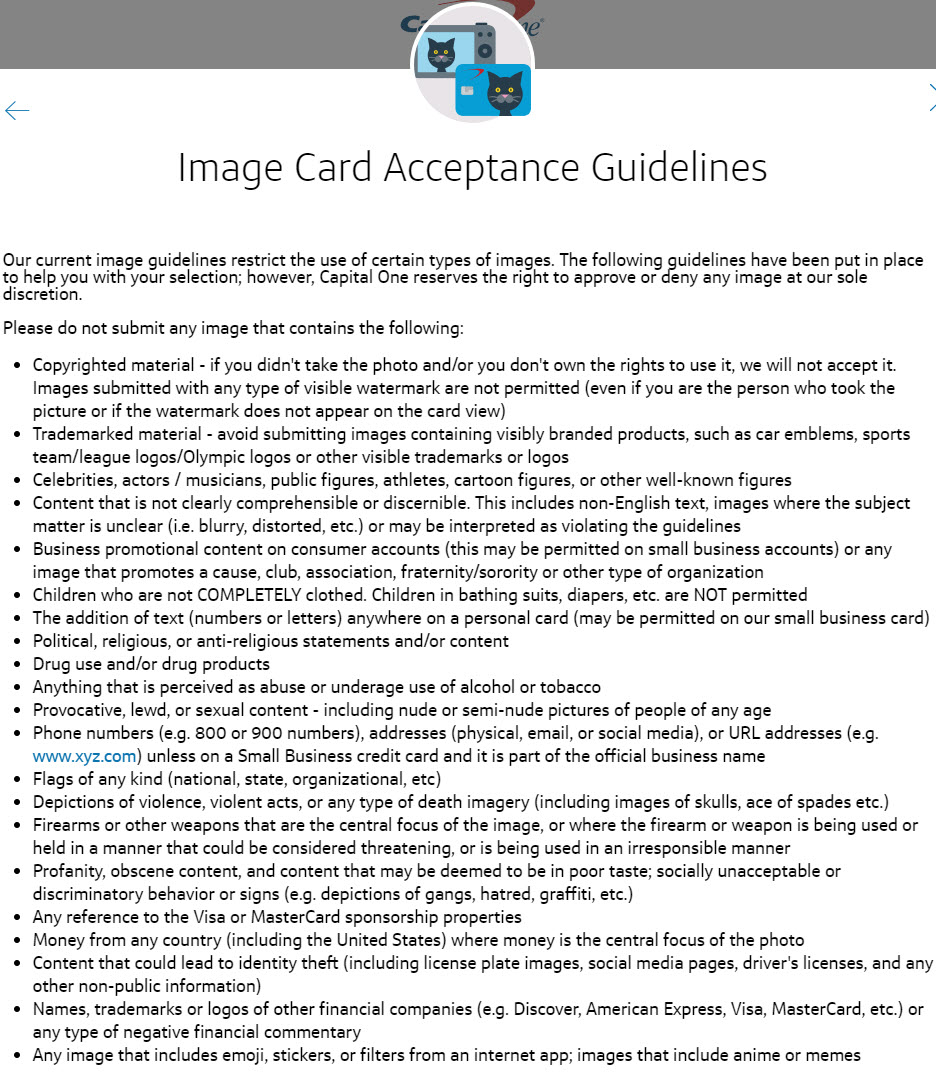
Before you uncork your creative juices, note that there’s LOTS of stuff Capital One won’t let you put on your card. Things that jump out to me are:
- Copyrighted photos
- Trademarks, like sports team logos or car emblems
- Famous people
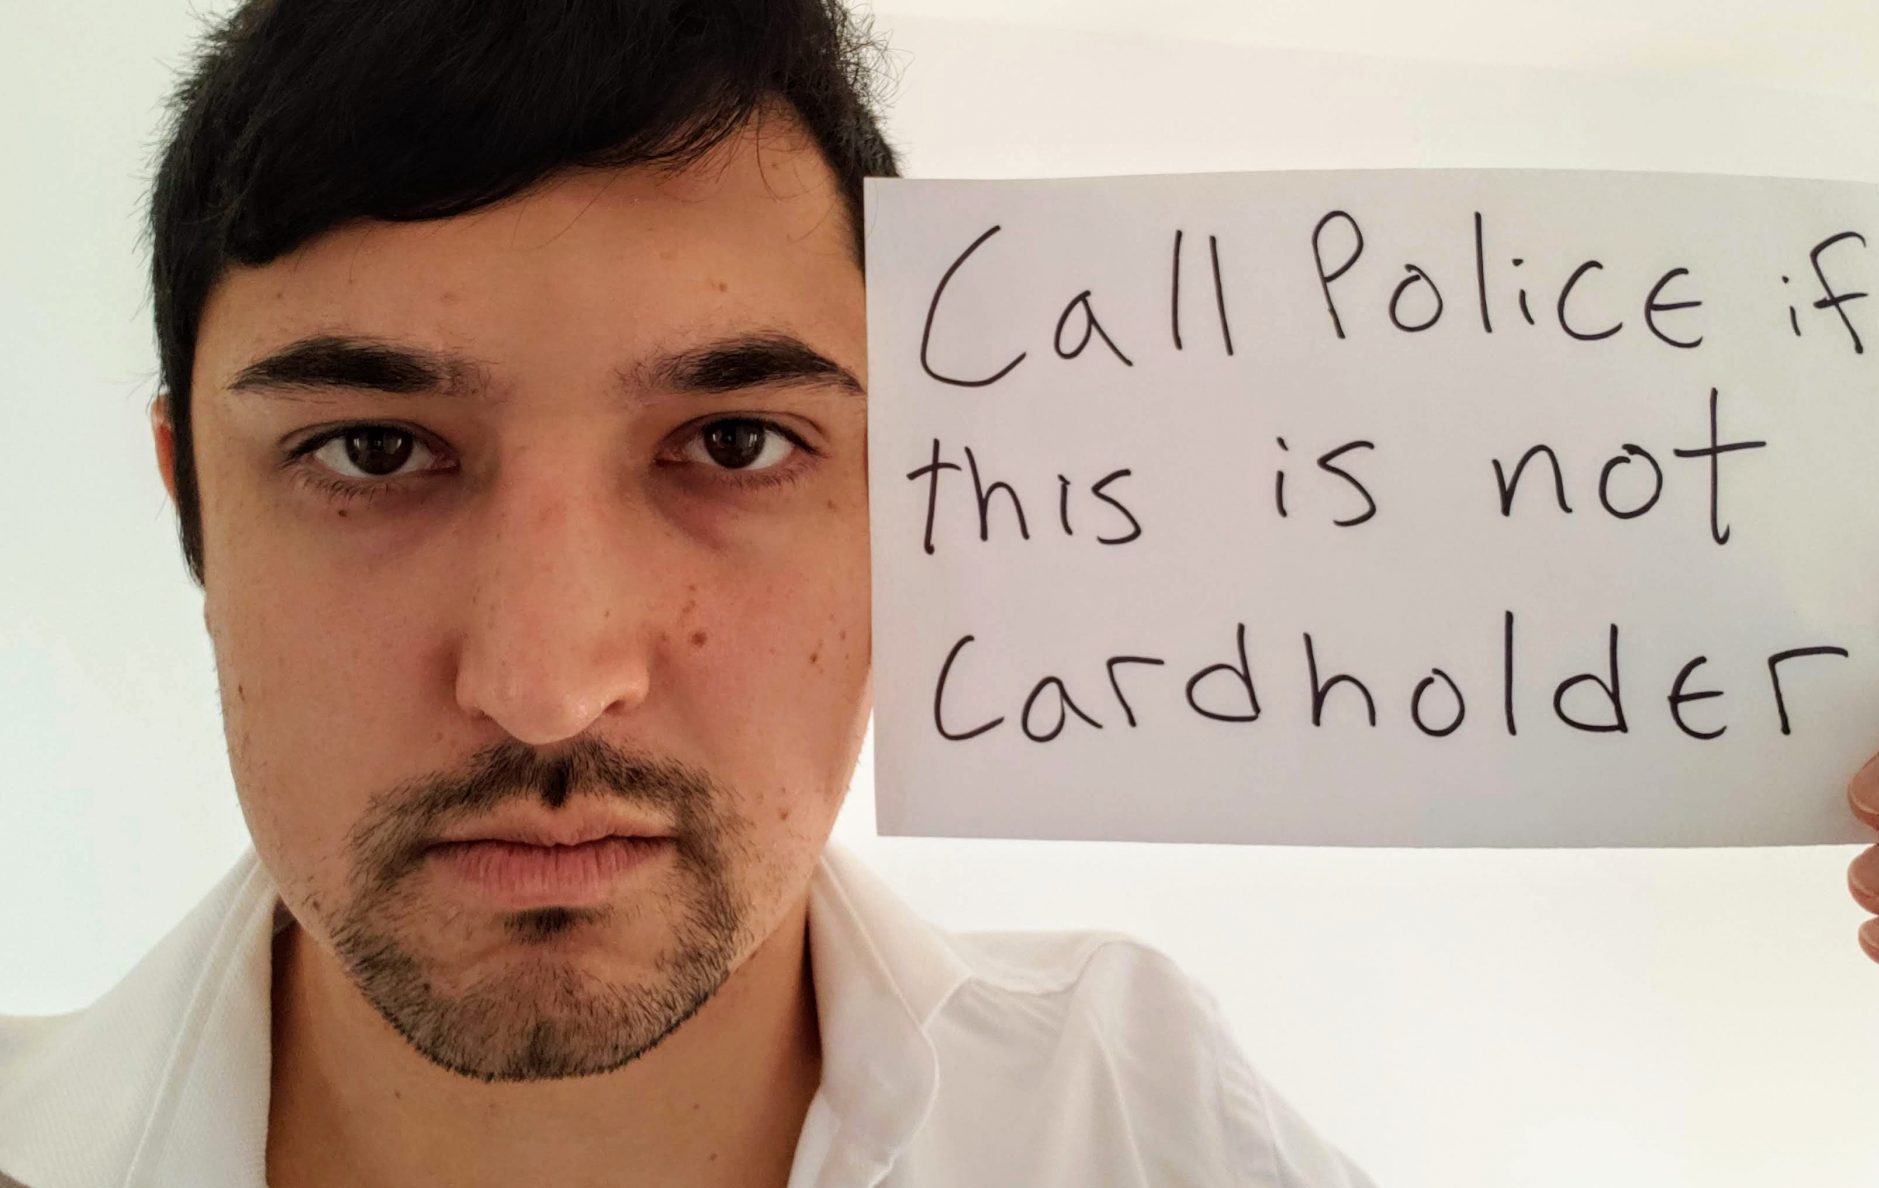
- Any text (unless it’s a small business card)
- Anything religious
- Emojis, memes, or any cartoons
- Money
Here’s the full list of guidelines:
Here’s how to make a customized card.
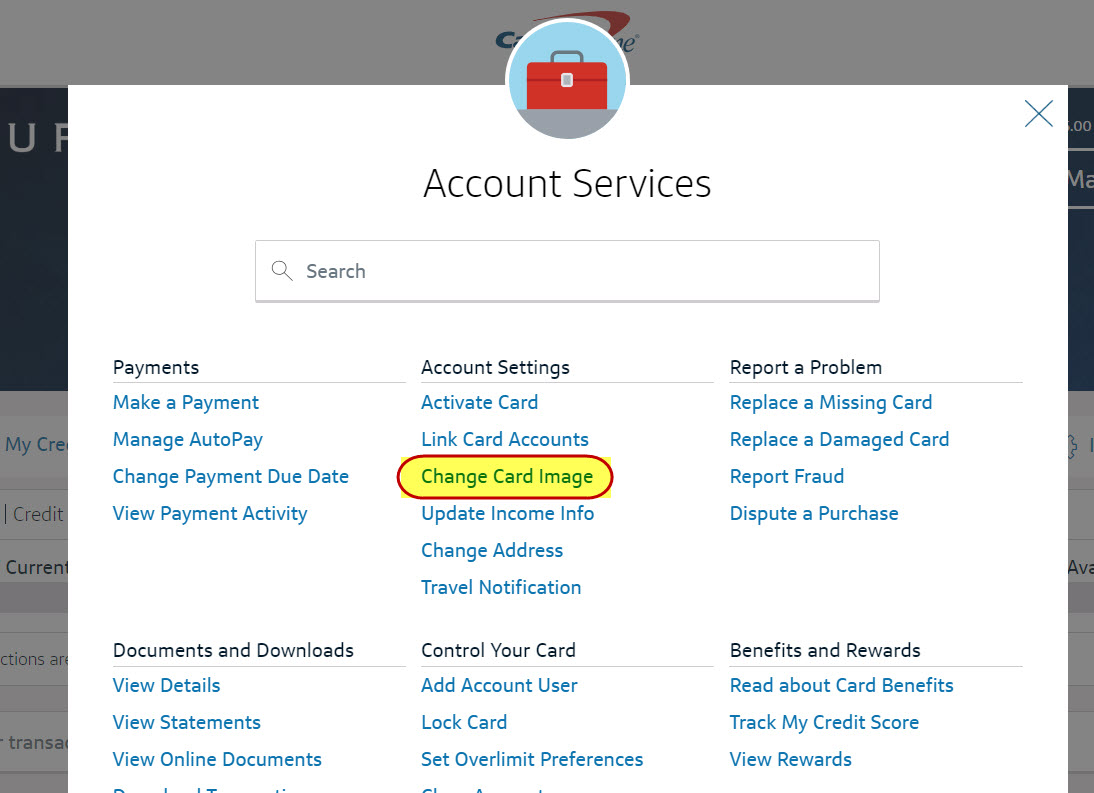
Step 1. Log Into Your Account and Click “Change Card Image”
Under “Account Settings” in the account services page of your online Capital One account, you’ll see a link that says “Change Card Image“. Click that.
Step 2. Find the Picture You Want on Your Card
Click the “Browse” button on the next page to find the image you want from your computer. The picture will need to be at least 800 X 800 to qualify as an eligible picture.
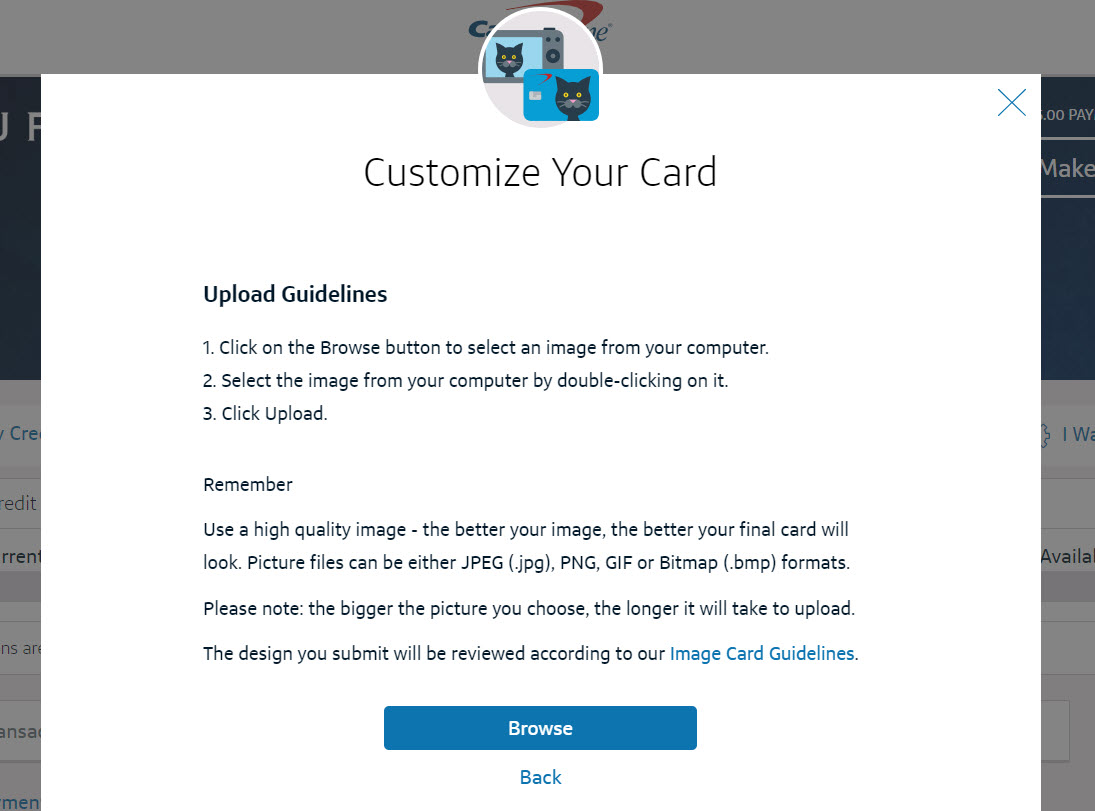
Click the Image Card Guidelines to see the full list of rules about what type of picture you can upload.
Step 3. Upload Image and Click “Next”
Once you’ve found the picture you want, upload the photo. You’ll have the option of increasing or decreasing the size, flipping, inverting, and rotating. As long as the image fills the entire card, you’re good to go. Then click “Next“.

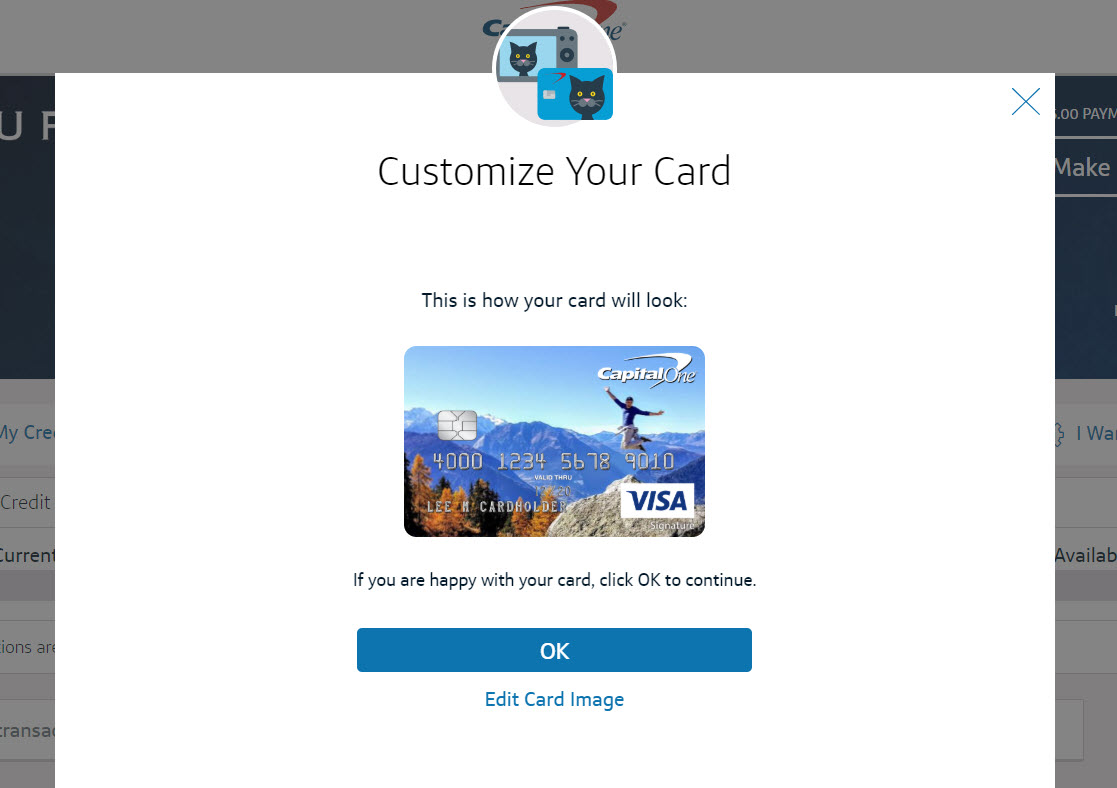
Step 4. Preview Your Card
After you’ve centered your picture, you’ll see a preview of what your card will look like. Click “OK” if you’re satisfied.
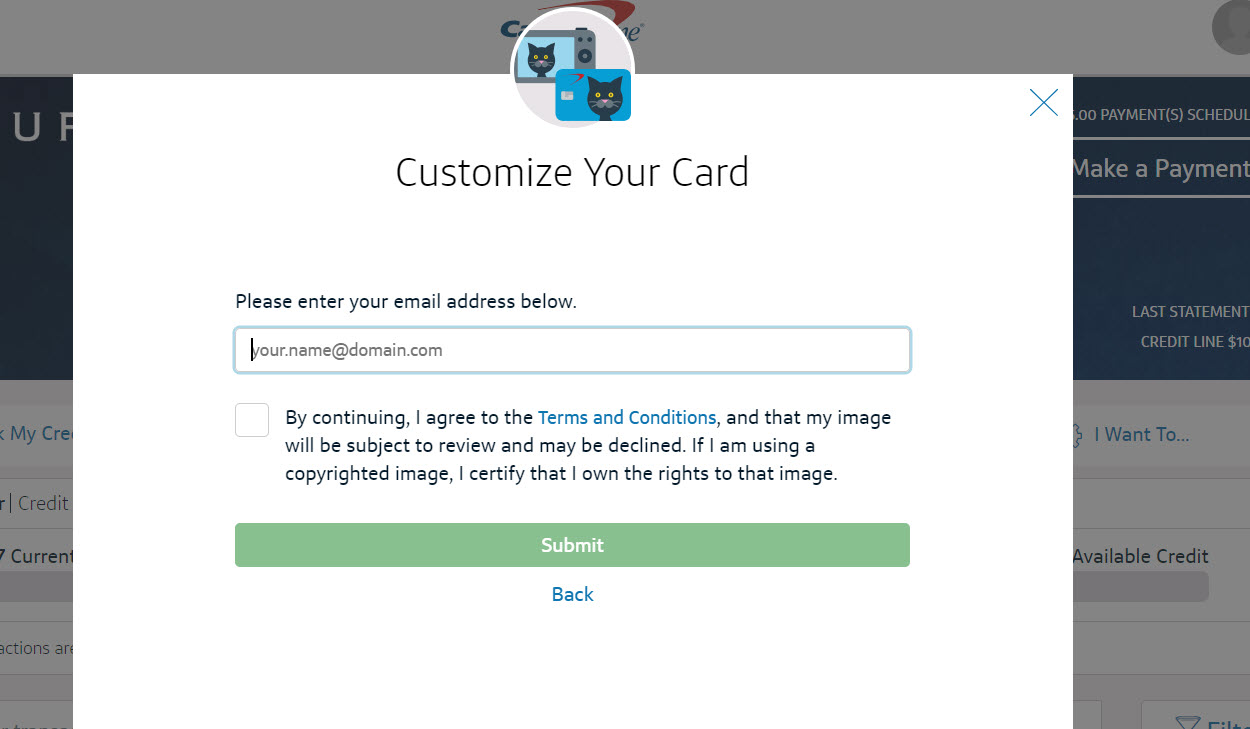
Step 5. Enter Email Address and Click “Submit”
Next is the final step. Enter your email address and click the box agreeing to the Terms & Conditions. Then click “Submit“.
Once you submit your image, you can NOT resubmit a picture for 30 days. So make sure you know what you want before submitting!
Capital One will then review your new card look. If they have a problem with it, they’ll email you. Otherwise, you’ll receive your card in a week or two.
Bottom Line
Creating a gorgeous custom Capital One card takes only a few clicks. The tough part is ensuring you follow their (substantial) list of restrictions. Capital One also mentions that this feature isn’t available on certain partner cards.
Have you ever created a personalized Capital One card? I’d love to hear a couple of goofball ideas.
Editorial Note: We're the Million Mile Secrets team. And we're proud of our content, opinions and analysis, and of our reader's comments. These haven’t been reviewed, approved or endorsed by any of the airlines, hotels, or credit card issuers which we often write about. And that’s just how we like it! :)


Join the Discussion!